Planning Your Apothecary Garden: Step-by-step For Beginners
This post contains affiliate links. If you choose to purchase through these links, I may earn a small commission at no additional cost to you. I only share products I genuinely use or feel good about recommending.
My God Is So Great
My God is so great—thank You, Lord. Truly. Every year when seed season rolls around, I’m reminded again how faithful He is, and how much provision He’s placed right in our hands.
If you’ve ever thought, “I wish I could walk outside and harvest my own herbs for teas, tinctures, or everyday herbal preparations,” this post is for you.
This blog post goes along with Apothecary Garden – Video One, where I’m working in my little greenhouse, starting seeds and sharing how you can plan and grow your own medicinal herb garden—whether you have acres of land or just a small porch or balcony.
👉 You can watch the full video here: Grow Your Own Medicine Chest
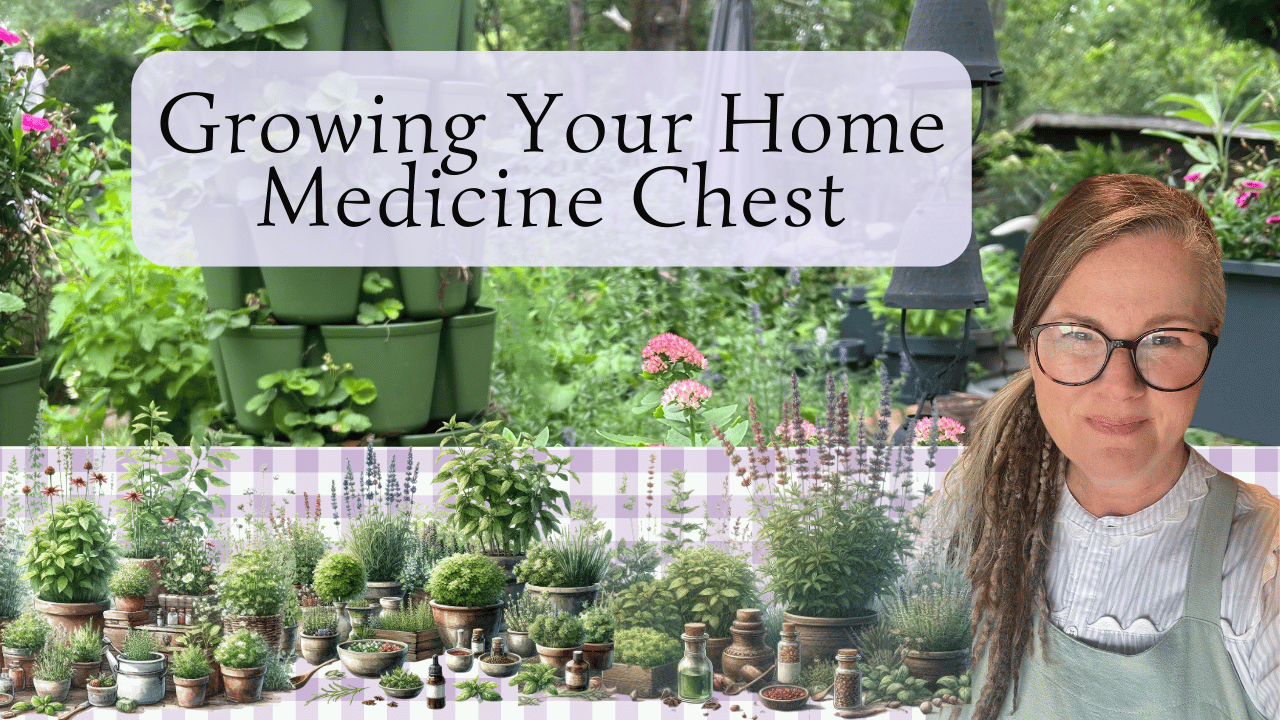
Growing Your Home Medicine Chest
I started my very first garden about fifteen years ago in a small backyard in the city. Over time, the Lord led us to land in the country, where I learned to grow fruits, vegetables, and culinary herbs. As I began building my home apothecary—and later opening my herb shop here on our property—I knew I wanted to grow medicinal herbs as well.
That’s been my path. But here’s what I want you to know: even if you’ve never grown anything before, you can do this. Each herb has its own needs, but none of this is complicated or out of reach.
I’ve heard so many people say they want to grow medicinal herbs, and I don’t think that’s by accident. I don’t know exactly what God is doing—but I’ve seen enough to believe He’s placing this desire in the hearts of many. A desire to grow the medicine He gave us, for our good.
This year, I’m relocating my apothecary garden closer to my herb shop so I can teach others in my local community how to grow and use herbs. I decided to document the entire process so you can follow along and, hopefully, feel encouraged to grow your own herbs too.
So grab something to write on, pour yourself a warm cup of tea, and let’s walk through this together.
Step 1: Determine What Space You Have
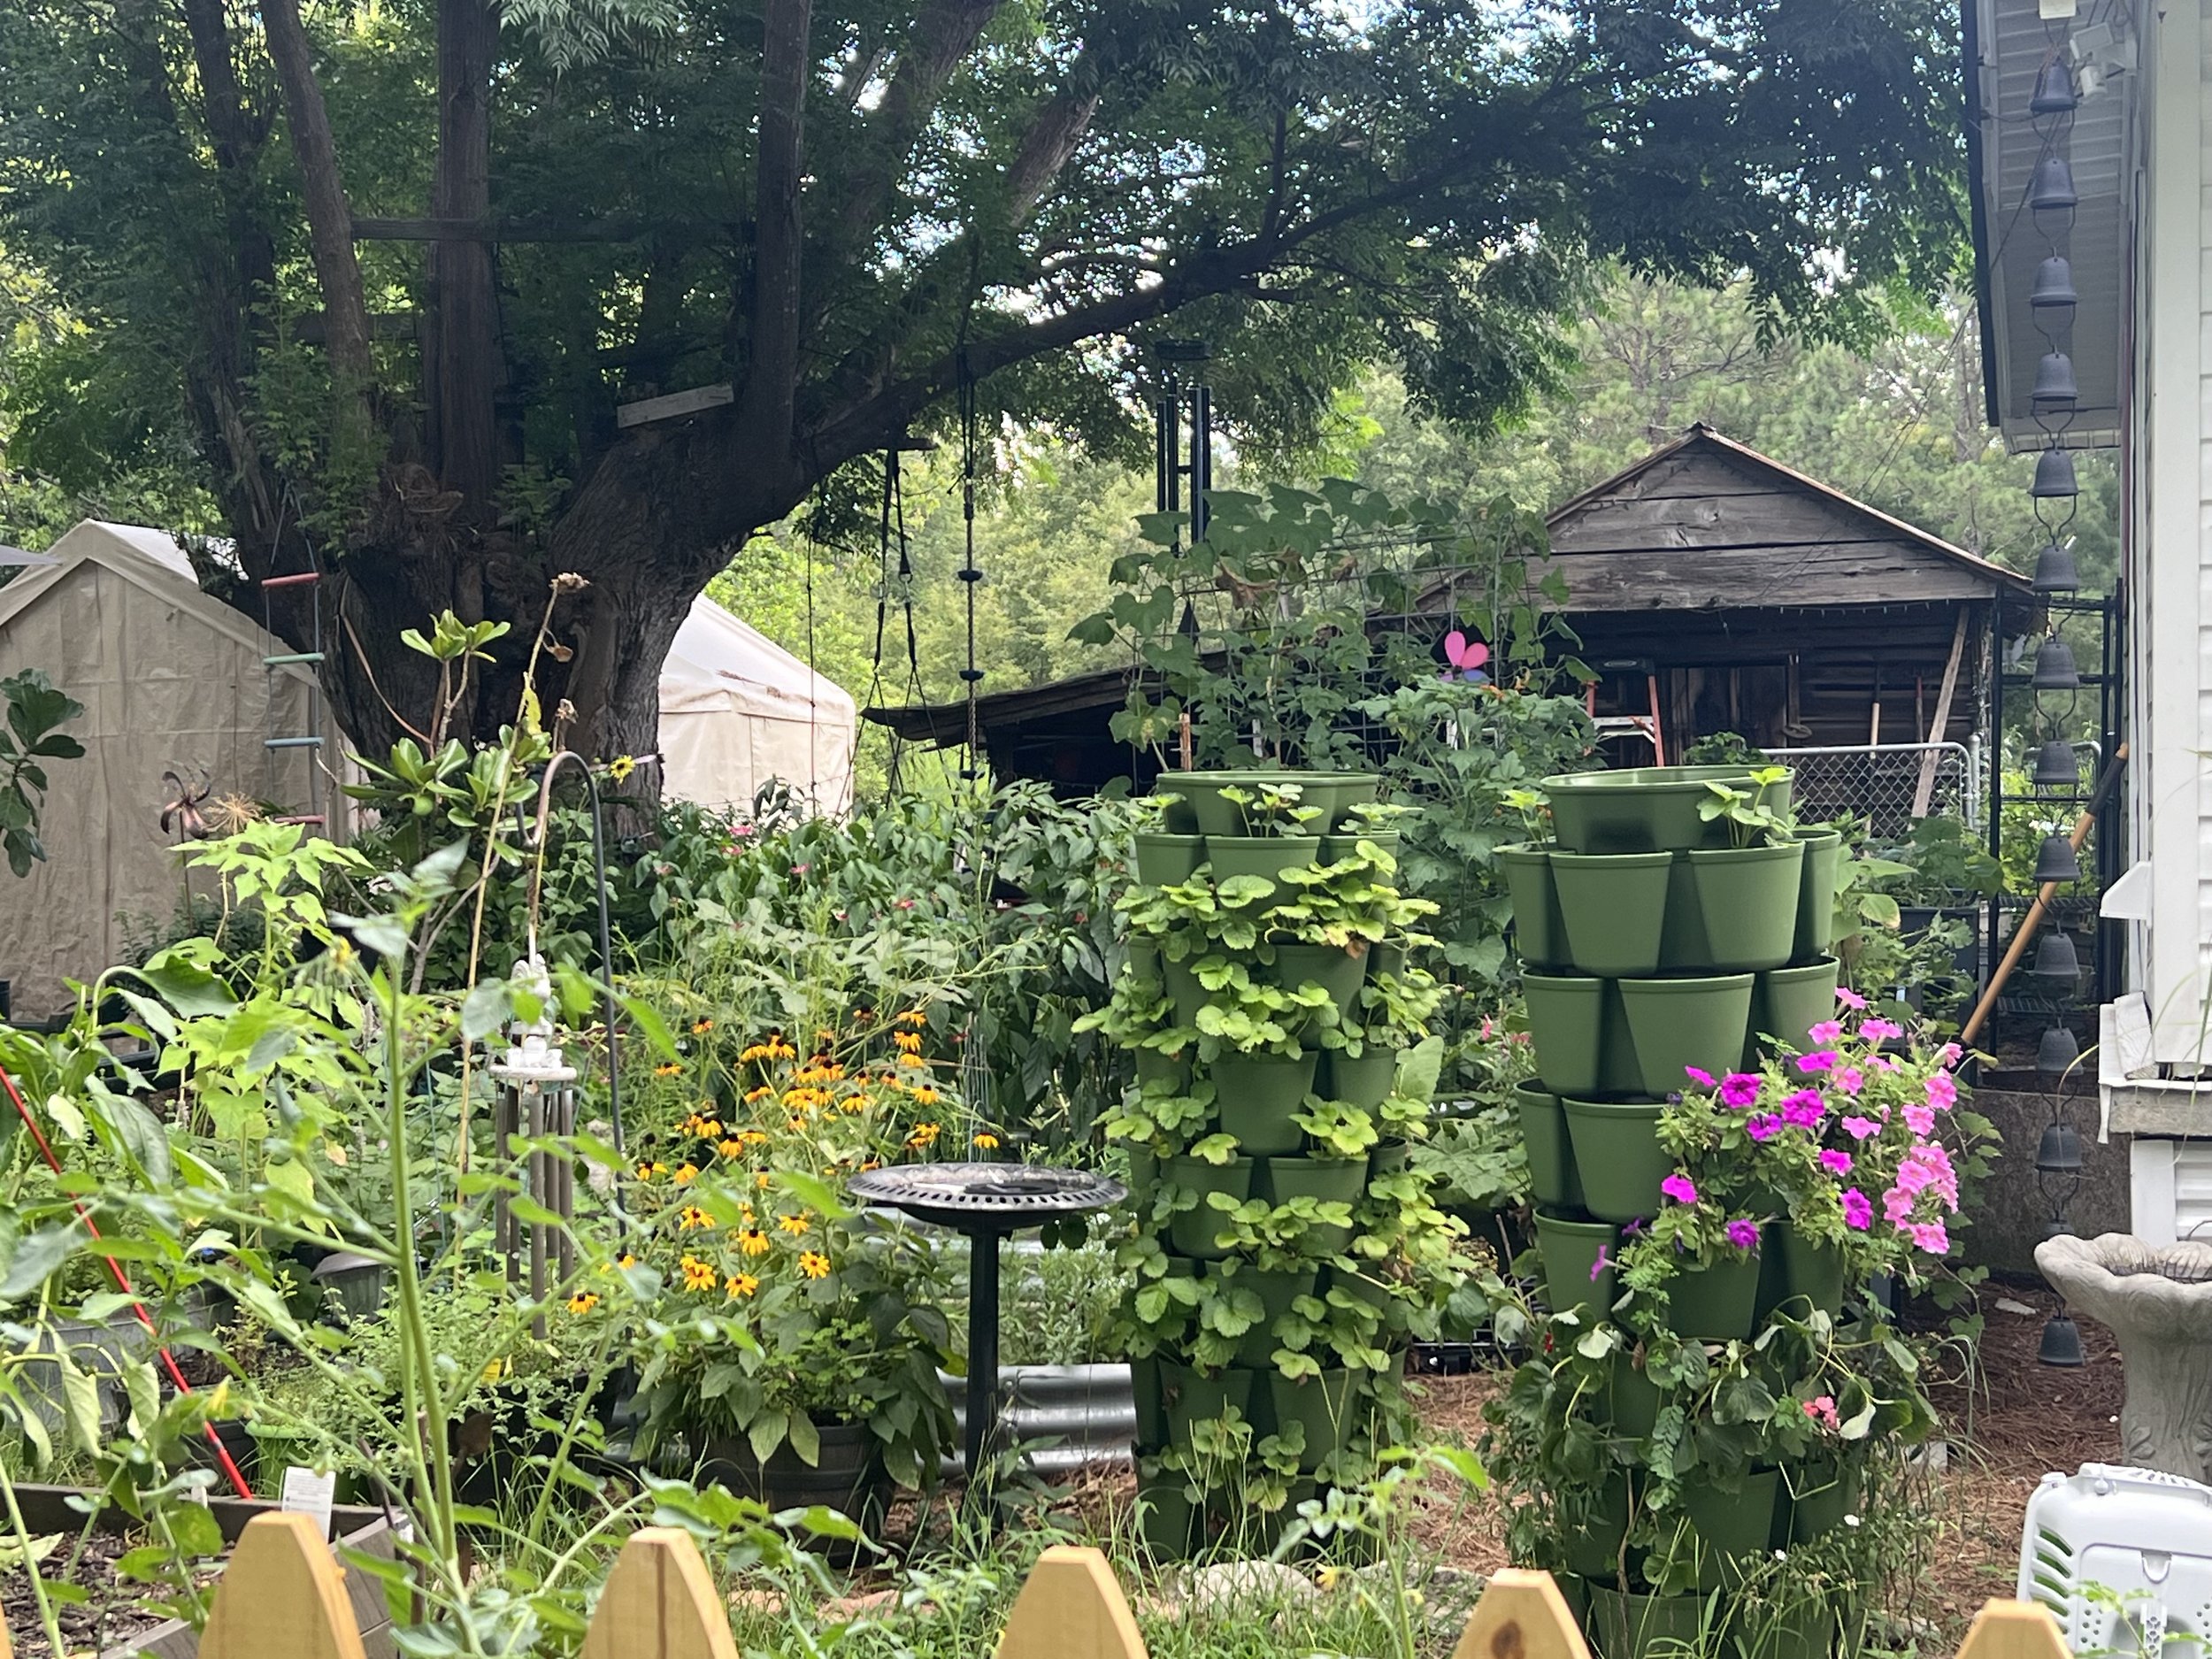
I know not everyone has land to grow on. At this stage of life, I personally want to grow as much as I can in pots and raised beds.
The good news? You can grow a lot of medicinal herbs in containers. I’ve successfully grown lemon balm, lavender, peppermint, marjoram, marshmallow, and comfrey in pots. (For marshmallow and comfrey, you’ll want deeper containers.)
Last year, I found very affordable containers at Lidl, and I love mixing pots with raised beds for both beauty and function. I already have raised beds from Amazon and Vegega ready to fill, and I’ll likely add more as this garden grows.
This isn’t to tell you what to do—just to get you thinking.
Ask yourself:
Will you grow in pots, raised beds, or directly in the ground?
Do you have a patio, porch, or balcony you could use?
There’s no right or wrong answer here. Start where you are.
Step 2: Decide What You Want to Grow
Once you’ve considered your space, the next step is simple—but important.
Think about you.
What herbs do you already use?
What herbs do you want to learn more about?
Growing your own herbs is one of the best ways to truly learn and understand them.
To help myself stay organized, I created a reusable Apothecary Garden Planner. There’s a dedicated page just for this step, along with space to record seed and plant sources, costs, planting details, harvest notes, and how each plant grew.
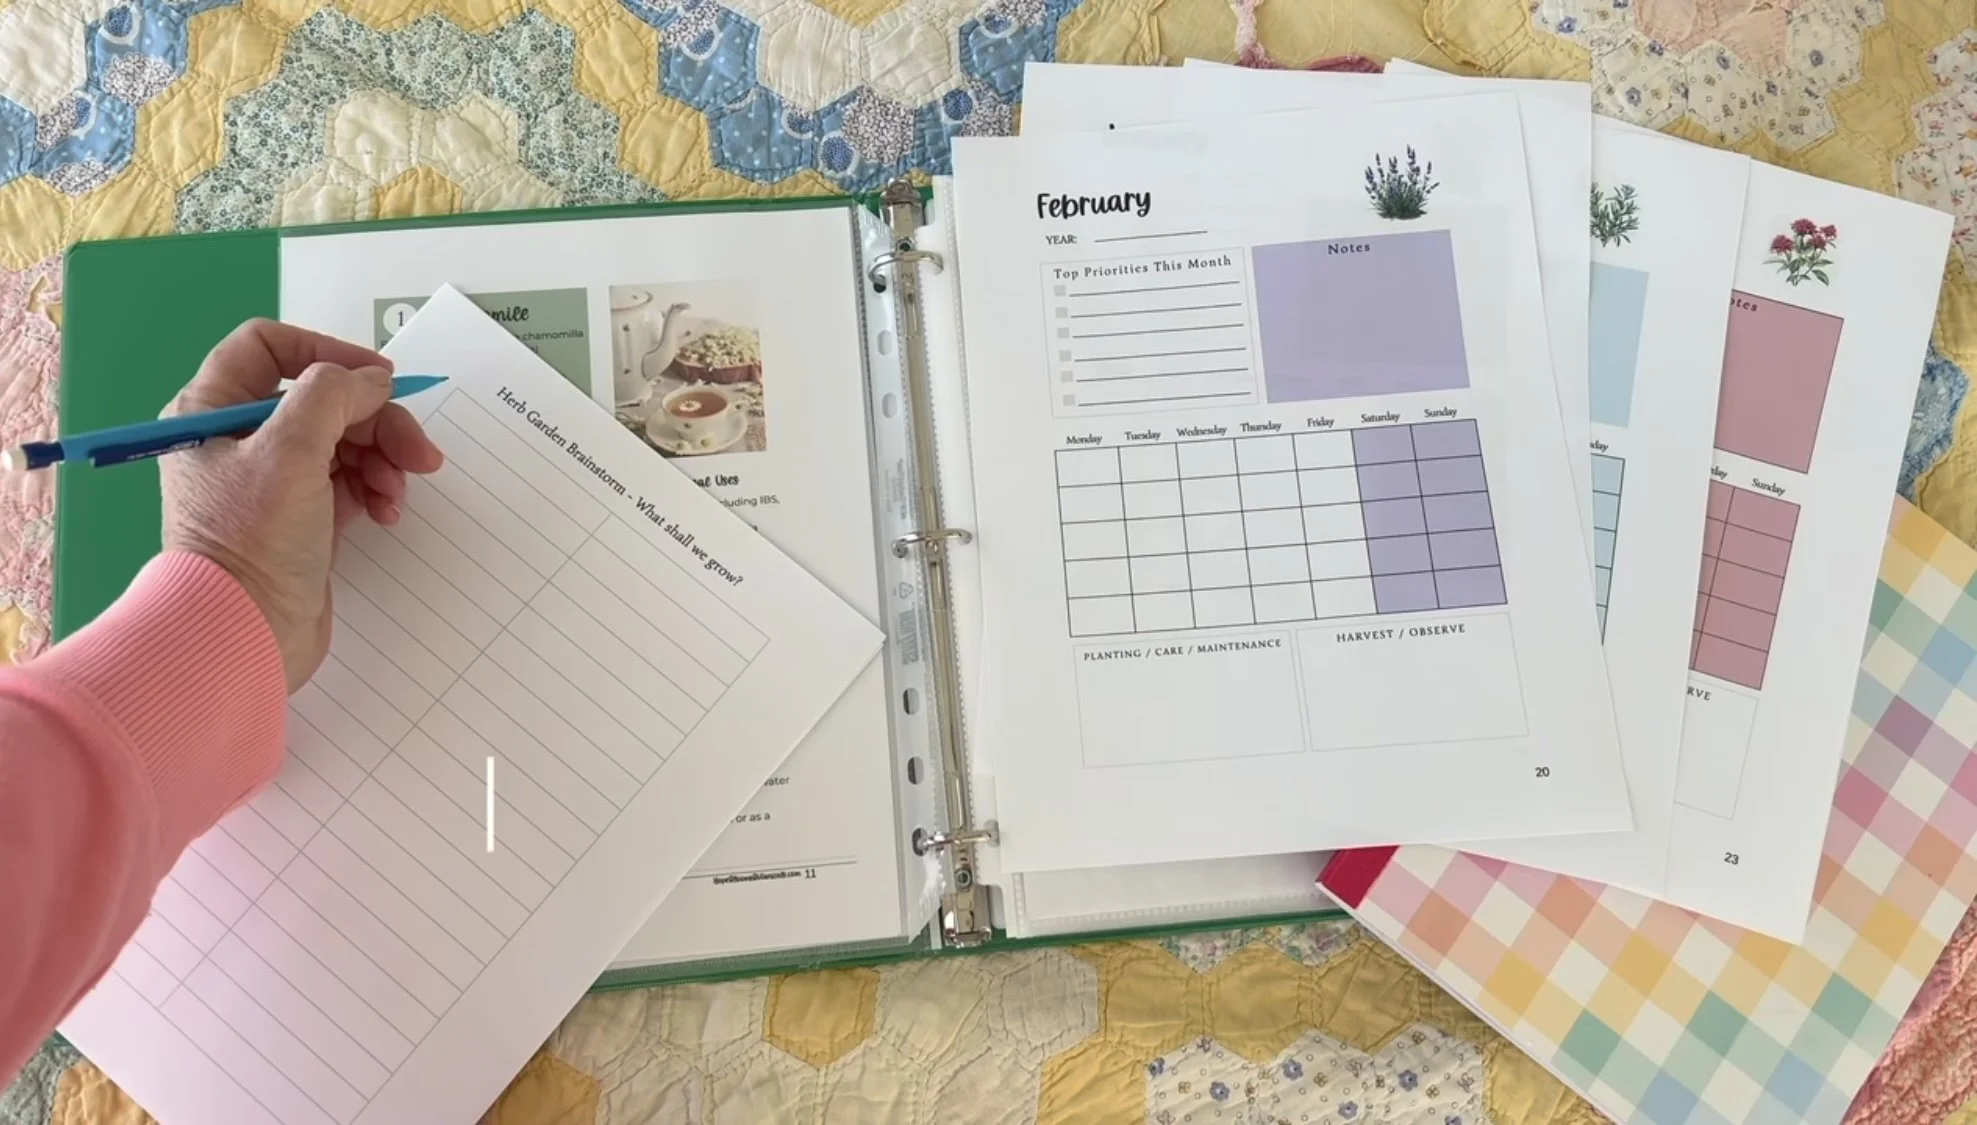
It also includes seasonal and monthly planning pages so you’re not trying to keep everything in your head, and reflection pages at the end of the year to help you plan better for the next season.
No problem if a planner isn’t right for you—any notebook will do—I just personally love having a beautiful open and go resource to keep everything in one place.
This year, I’m hosting a seedling sale on our farm, so my plant list is longer than usual. I’m especially excited about growing lots of lemon balm, and I’m also attempting rows of lavender—fully aware that it will be a learning curve for me.
You can start with just one or two herbs. Grow what you’re able.
Step 3: Start Seeds, Buy Starts, or Do Both
Next, decide whether you want to start plants from seed, buy plants that are already started, or use a combination of both.
Starting from seed can save a lot of money, and if that’s your plan, now is the time to order. I’ve ordered seeds from Strictly Medicinals in the past and am also using some leftovers from last year. This year, I ordered from Survival Seeds—I love their packaging and how quickly they arrived.
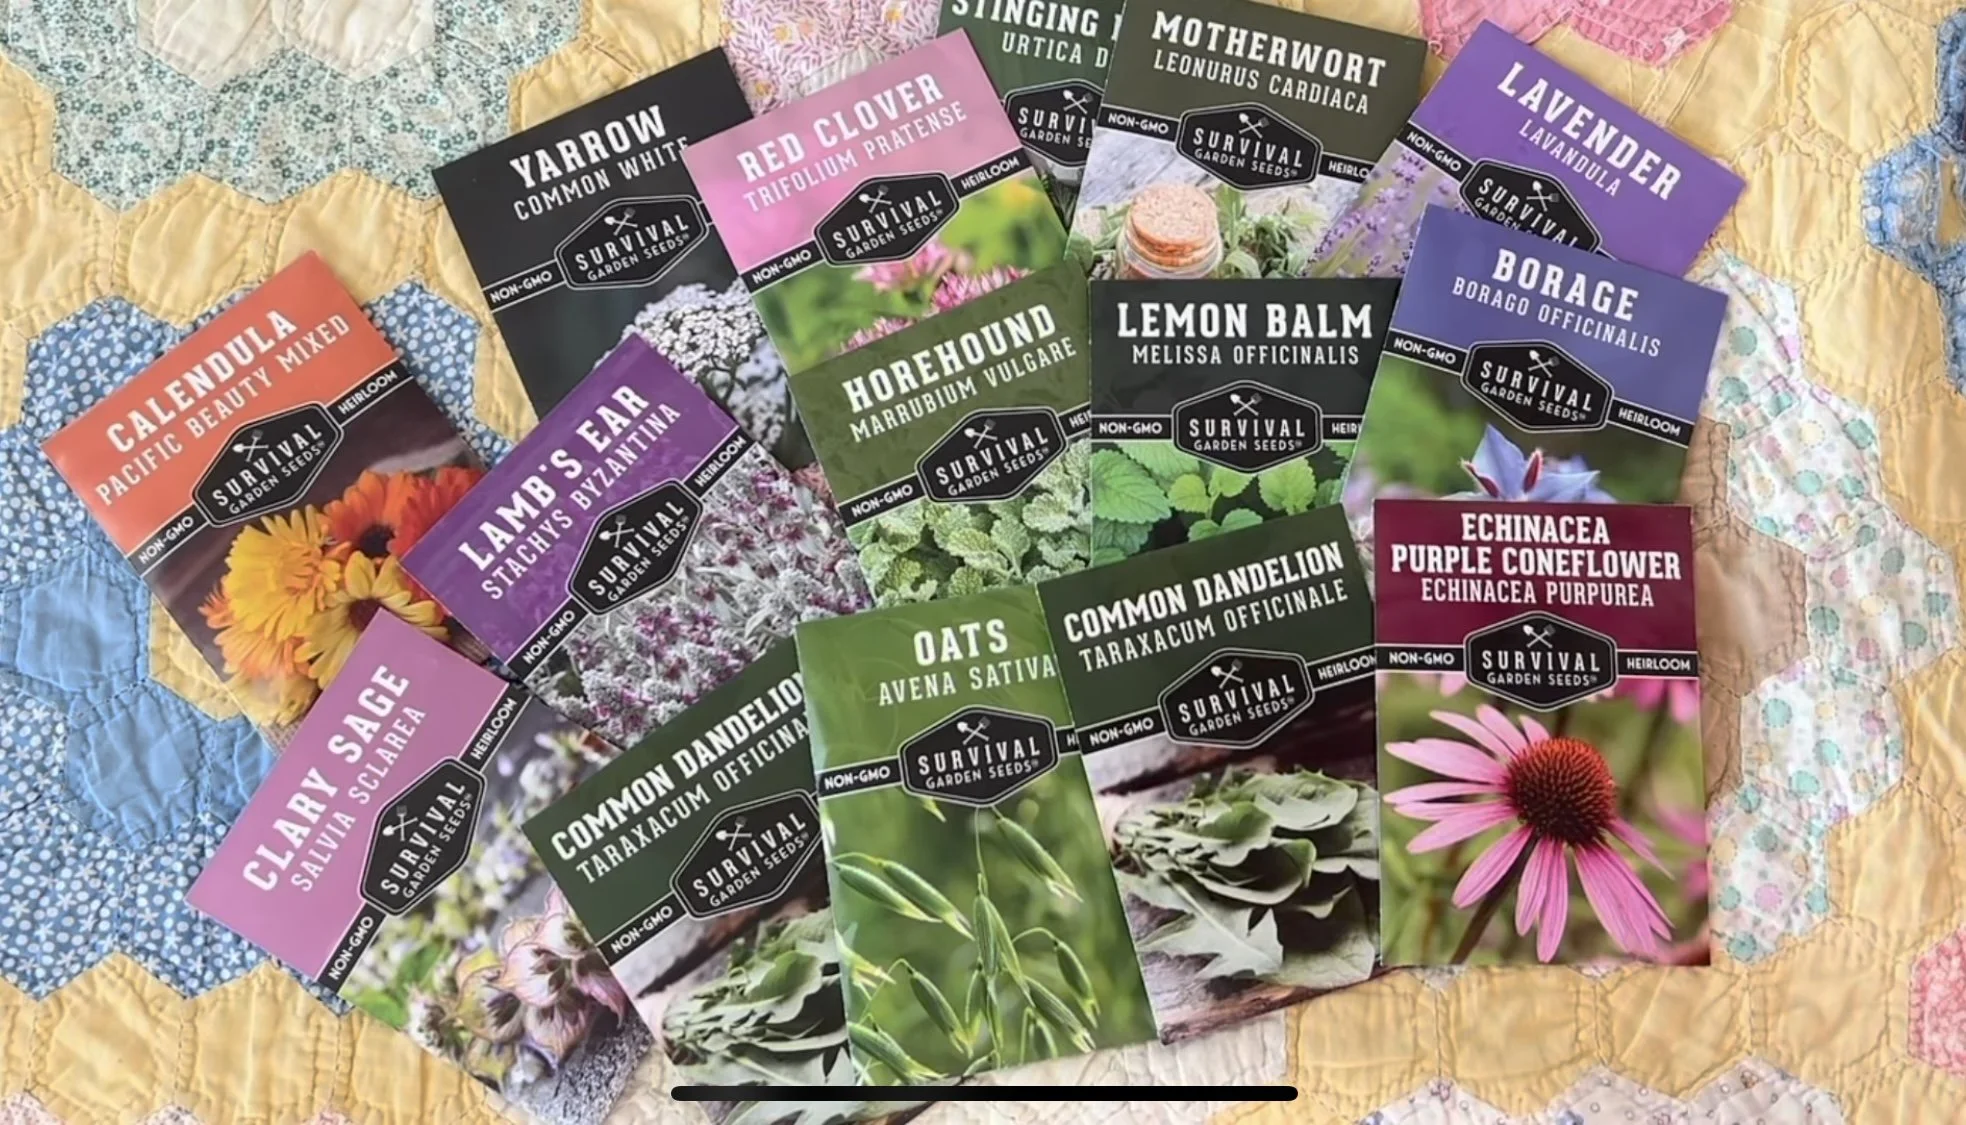
Medicinal Herb Seeds for Planting | Variety Pack of Heirloom, Non-GMO Herbs – Herbal Teas, Tinctures & Home Apothecary Garden Kit – Survival Garden Seeds
Wanting to start smaller? No problem! These come in many sizes!
One important note: some seeds, like lavender, require cold stratification. It’s not difficult, but it does take time and is a step you don’t want to skip. If you’d like, I can share a separate video walking you through that process.
If starting seeds isn’t feasible for you, that’s okay. Time, space, and slow germination can make buying started plants the better option. Medicinal herbs aren’t always easy to find locally, but keep an eye on Marketplace and local plant sales. For example, there’s an annual medicinal herb sale in Asheville, North Carolina.
If you know of a medicinal herb sale in your area, please share it—those resources are so helpful.
I’ll also be covering which herbs are easiest to start from seed and which are better to buy already started in upcoming videos. If you’d like that information now, my Apothecary Garden Growing Guide covers 20 herbs and includes notes on growing, harvesting, and whether starting from seed is recommended.
Step 4: Find Your Last Frost Date
Your next step is determining your last expected frost date.
If you don’t know your growing zone, you can easily look it up online using your city and state. I’m in zone 8b, where our last frost typically falls in late March. Around here, most people plant after Good Friday, which gives me a reliable planting window.
Once you know your frost date, this is where reverse engineering comes in.
If a seed packet says to start seeds six to eight weeks before your last frost, simply count backward on the calendar. That tells you exactly when to start your seeds indoors.
Some gardeners prefer to direct sow seeds after the last frost. I personally like starting most plants in seed trays, with a few exceptions—such as oats, alfalfa, and clover, or plants that don’t transplant well.
The reason is moisture control. Once a seed begins germinating, if it dries out, it dies. I find it much easier to monitor moisture and care for seedlings when they’re all together in trays.
Step 5: Sketch Your Garden Plan
Now comes the fun part.
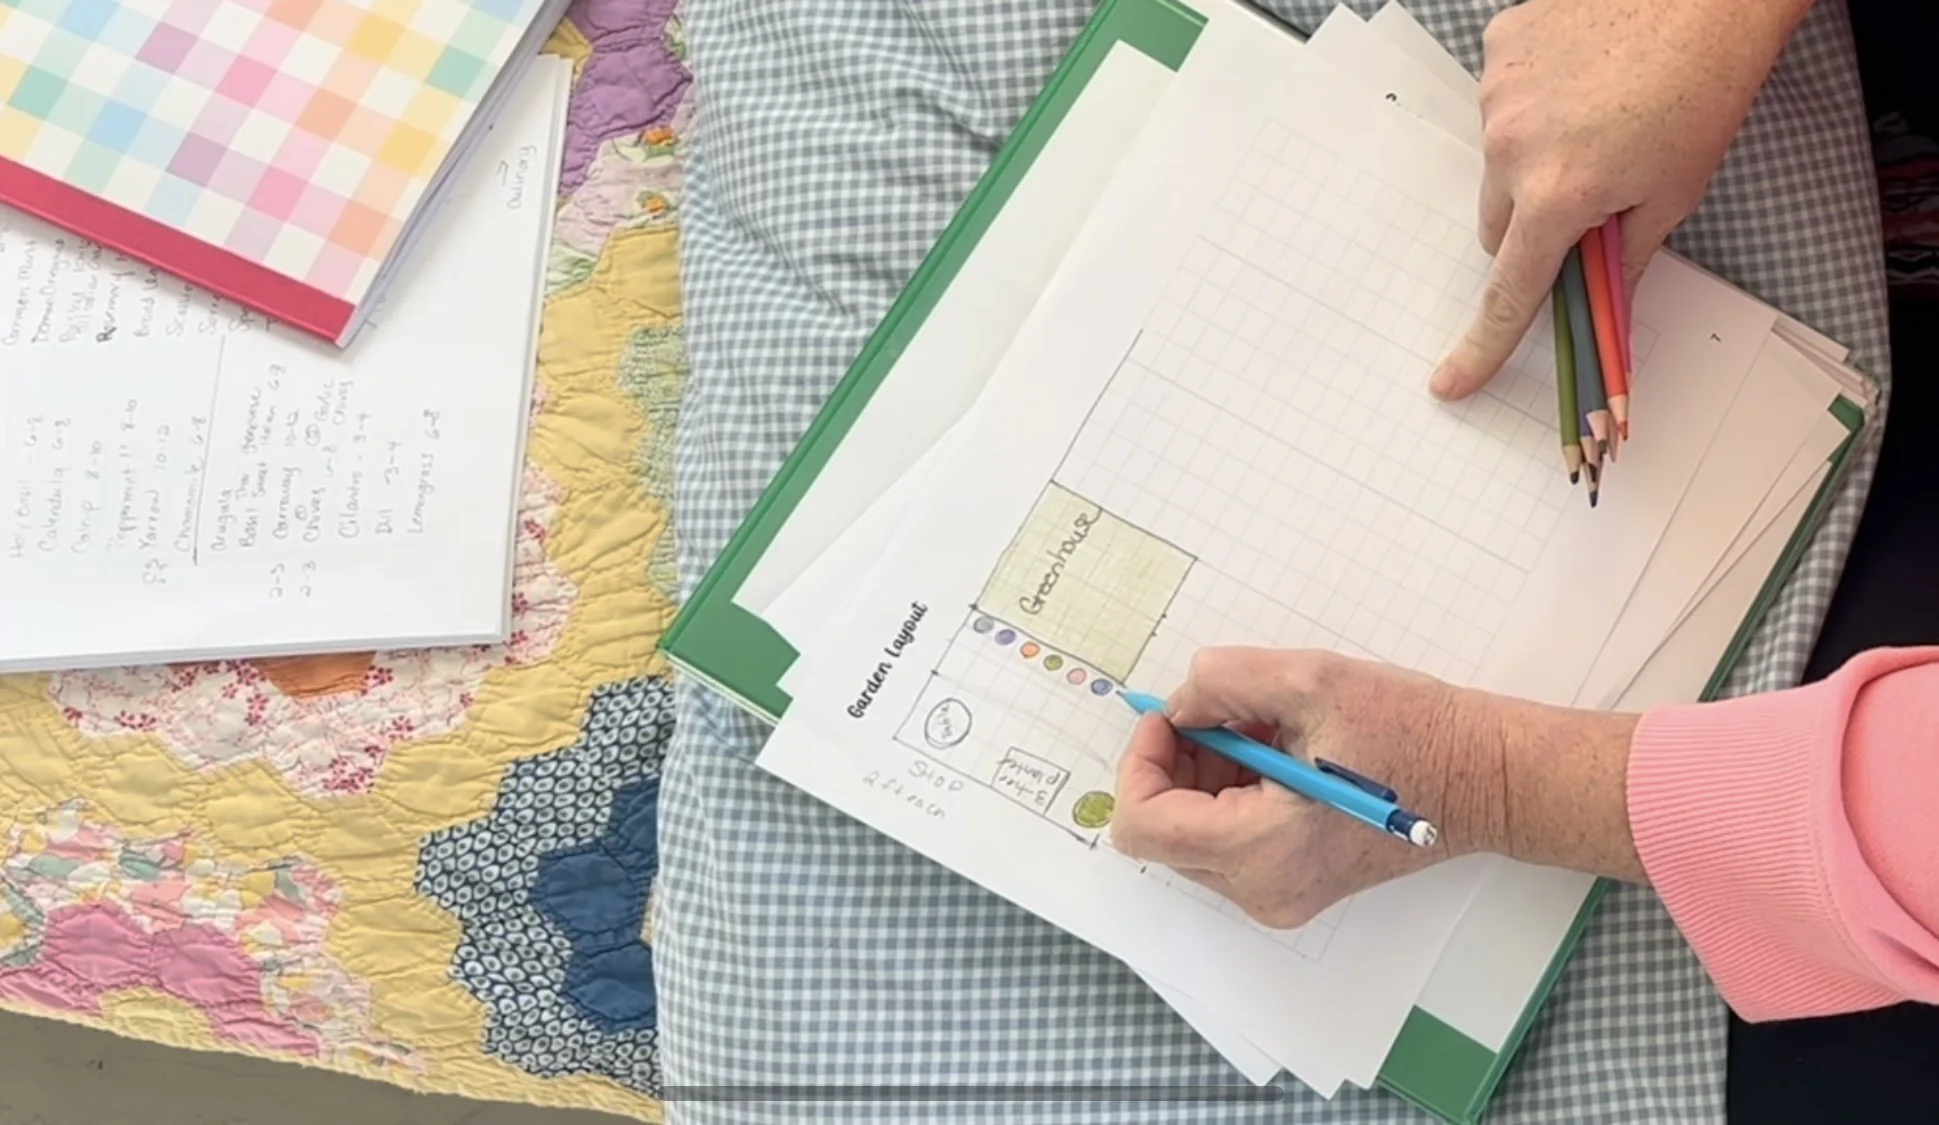
You don’t need to be an artist for this—I promise.
I like using graph paper because each square acts as a ruler. Before drawing anything, I measure the actual space I’m working with and decide what each square will represent (one foot, two feet, etc.). From there, I sketch the space to scale and begin placing beds, pots, or planting areas.
In my planner, I include graph paper and always print multiple copies so I can try different ideas without erasing everything. This is especially helpful since I’m planning more than one garden area this year.
And remember: this plan is flexible. What you imagine on paper may not be what you end up loving—and that’s completely okay. This is a starting point, not a final decision.
You don’t need to do all of this in one sitting. This is something you can piddle with over a few days or weeks as you think, pray, and picture herbs growing right outside your door.
Growing Together This Season
I’m starting this year with a bit of a blank slate myself, so if you’re unsure about your plan, you’re not alone.
I’m truly excited for us to grow our gardens together this season. If you’d like to share your progress, feel free to send photos—my contact information is linked below.
In the next video, we’ll talk about starting seeds: the soil you’ll need, containers, lighting, and which herbs are especially good choices for beginners.
Thank you for being here. 🌱

The Apothecary Garden is more than a how-to on growing herbs—it’s a practical, plant-centered guide to understanding the medicinal herbs you grow and how they’ve been traditionally used.
Whether you’re tending a few containers or establishing garden beds, this eBook walks you through planning, planting, and caring for a home apothecary garden with confidence.